Introduction:
Installing a chandelier can instantly transform the ambiance of your home, adding a touch of elegance and sophistication to any room. While the task may seem daunting, the process of installing a chandelier can be straightforward and rewarding with the right approach and guidance. In this article, we will provide a comprehensive step-by-step guide on how to install a chandelier in your home. Divided into five parts, each containing two levels of content, let’s explore the world of chandelier installation and bring radiant beauty to your living space.
Part 1: Preparing for Chandelier Installation
Level 1: Safety and Precautions
- Safety First: Before beginning any electrical work, always turn off power to the area where you’ll be installing the chandelier at the main circuit breaker.
- Gather the Tools: Make sure you have all the necessary tools and equipment on hand, including a voltage tester, ladder, wire cutters, screwdrivers, and electrical tape, among others.
Level 2: Assessing the Ceiling and Electrical Connections
- Ceiling Examination: Inspect the ceiling to ensure it can support the weight of the chandelier. If needed, reinforce the electrical box with a brace or install a support bar.
- Electrical Connections: Check the wiring and electrical box, ensuring it complies with local electrical codes and requirements. If needed, consult a licensed electrician to ensure proper wiring and connections.

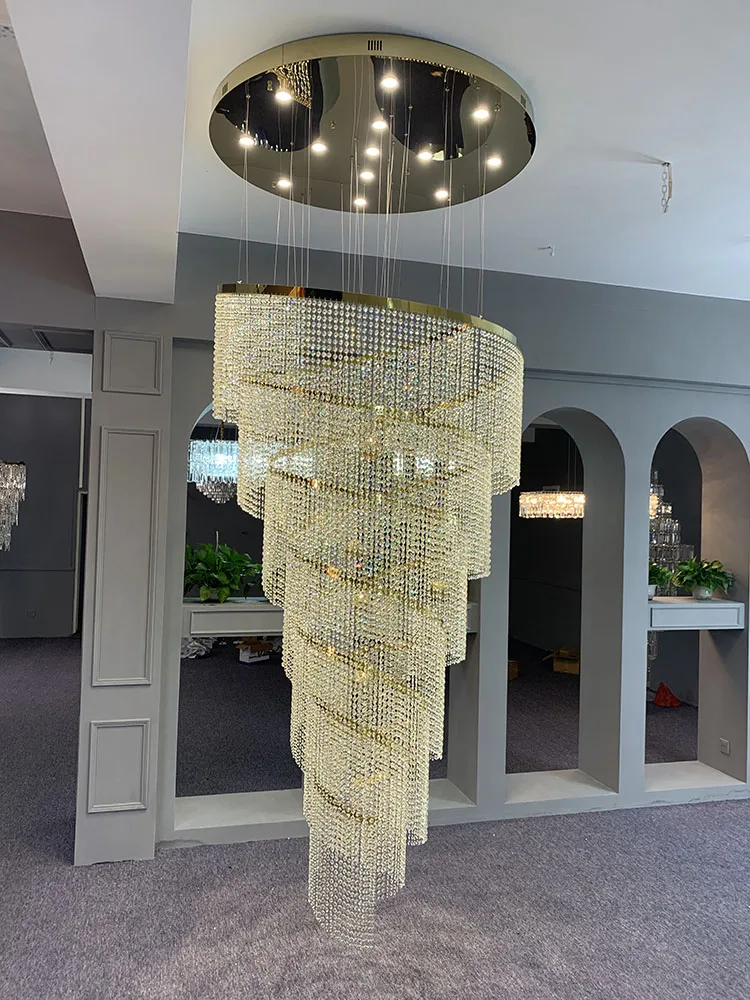
Part 2: Assembling the Chandelier
Level 1: Reading the Instructions and Preparing Components
- Instruction Manual: Carefully read and understand the manufacturer’s instructions that accompany the chandelier. Familiarize yourself with the assembly process and any specific requirements.
- Organize the Components: Lay out all the components of the chandelier, ensuring you have all the necessary parts and hardware for the installation.
Level 2: Assembling the Chandelier
- Guidelines and Steps: Follow the manufacturer’s instructions to assemble the chandelier. This may include attaching arms, attaching crystals or shades, or any other specific steps outlined in the instructions.
- Secure Connections: Ensure all connections, such as wires, arms, and decorative elements, are securely fastened according to the manufacturer’s guidelines, using appropriate tools and techniques.
Part 3: Installing the Chandelier Bracket and Mounting Plate
Level 1: Mounting the Bracket
- Ceiling Marking: Determine the desired location for the chandelier and mark the specific spot on the ceiling. Ensure the chosen location aligns with the electrical box and complements the room’s design and layout.
- Attaching the Bracket: Install the chandelier bracket by screwing it into the ceiling using the provided hardware. Ensure the bracket is level and securely fastened to support the weight of the chandelier.
Level 2: Mounting Plate and Wiring Connections
- Mounting the Plate: Attach the mounting plate to the chandelier bracket, aligning the holes and securing it with the provided screws.
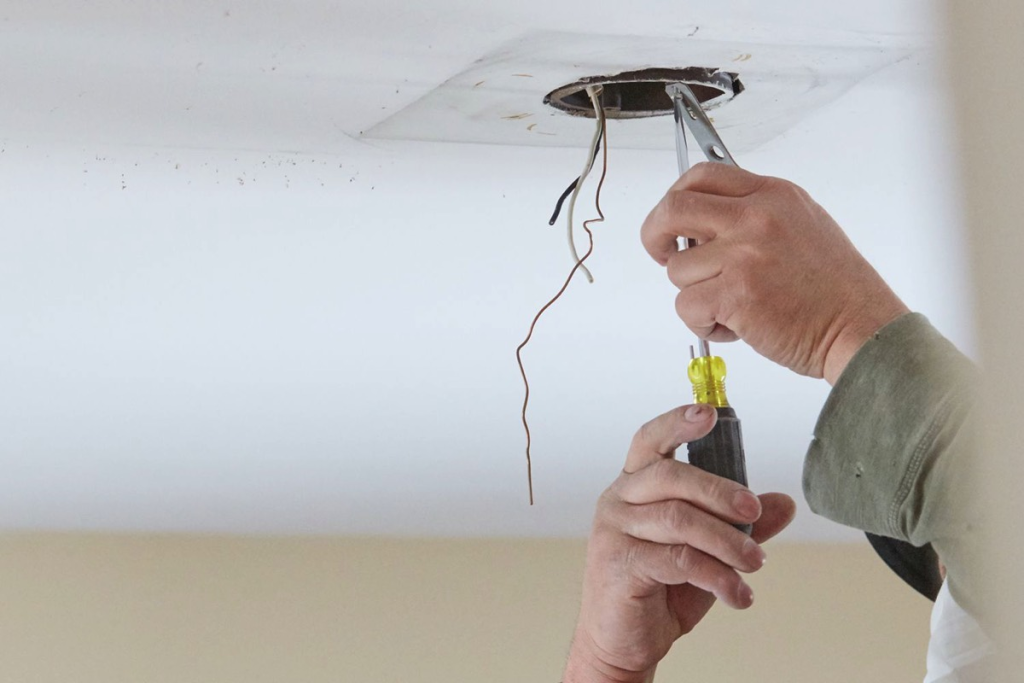
- Wiring Connections: Connect the chandelier’s wires to the electrical box wires by matching the appropriate color-coded wires (usually black to black, white to white, and ground to ground). Use wire nuts to secure the connections and electrical tape to cover the wire nuts.

Part 4: Hanging and Wiring the Chandelier
Level 1: Hanging the Chandelier
- Assembly Assistance: Enlist the help of a partner or friend to assist you in safely lifting and hanging the chandelier onto the mounting plate.
- Securing the Chandelier: Align the mounting holes on the chandelier with the corresponding holes on the mounting plate and attach them using the provided screws or securing mechanism. Ensure the chandelier hangs securely and does not wobble.
Level 2: Wiring and Testing
- Final Wiring Connections: Review the manufacturer’s instructions for any additional wiring connections, such as attaching ground wires or securing chain or cord.
- Testing the Chandelier: Once all the wiring connections are complete, restore power at the main circuit breaker and test the chandelier by flipping the switch. Ensure the chandelier functions properly and illuminates as intended before proceeding.

Part 5: Finishing Touches and Safety Checks
Level 1: Adjustments and Alignment
- Chandelier Leveling: Use a level to ensure the chandelier is properly aligned and adjust as needed by loosening or tightening the mounting screws or adjusting the chain length.
- Finishing Details: Carefully clean any fingerprints or smudges from the chandelier using a gentle cleaning solution appropriate for the material.
Level 2: Safety Checks and Final Considerations
- Inspecting Connections: Double-check that all electrical connections are secure and properly insulated with electrical tape or wire nuts.
- Safety Guidelines: Review safety precautions such as not exceeding the manufacturer’s recommended wattage, regularly inspecting and cleaning the chandelier, and avoiding contact with moving parts or hot bulbs.
Conclusion:
How to install a chandelier? Installing a chandelier can be a rewarding and fulfilling DIY project that enhances the beauty and atmosphere of your home. By following the steps outlined in this guide, you can confidently install a chandelier, adding a touch of elegance and sophistication to any room. Remember to prioritize safety, carefully read the manufacturer’s instructions, and adhere to local electrical codes and regulations. With patience and attention to detail, your chandelier installation will result in a stunning centerpiece that illuminates your living space and elevates the overall aesthetic. Embrace the beauty and radiance of a well-installed chandelier. And enjoy a home filled with enchanting ambiance for years to come.
Some general tips and considerations
In addition to the steps outlined in this guide, it can be helpful to have some general tips and considerations in mind when installing a chandelier. Firstly, it’s always a good idea to have a professional electrician inspect your electrical connections and wiring if you’re unsure about their safety or quality. They can ensure that everything is up to code and properly installed.
When it comes to maintenance, regularly clean the chandelier to keep it looking its best. Dusting or using a soft cloth to wipe away any dirt or grime can help preserve the shine and clarity of the crystals or decorative elements. Additionally, periodically check the chandelier’s hanging hardware, screws, and wiring connections to make sure everything remains secure over time.
Lastly, don’t be afraid to get creative with your chandelier installation. Consider the use of dimmer switches for adjustable lighting, or explore different bulb options to create various moods or effects. Your chandelier installation is an opportunity to showcase your taste and style. So feel free to experiment and make it your own.
By following proper installation procedures, adhering to safety guidelines. And adding your personal touch, you’ll create a captivating centerpiece that illuminates your space and truly reflects your unique style and vision. Enjoy the beauty and elegance your chandelier brings, and may it continue to shine brightly for years to come.